How to Build Furniture With Only Rope
Like shooting fish in a barrel DIY hanging rope shelf tutorial: how to brand beautiful boho farmhouse wood wall shelves for storage & home decor, with rope & a drill!
Confession: until just a year agone, I used to exist a total power tool phobia. The only time I touched a ability tool, was to hand it to hubby.

And then, when some blogger friends invited me to a ability tool challenge, I was instantly intrigued. Really, tin can we build furniture with simply a drill, the least intimidating of all power tools? ( OK, the lovely hardware shop people will brand a couple of elementary cuts for usa, of course!)
Easy to build and hang, this beautiful gold and turquoise DIY rope shelf is besides collapsible, keen for those of us who movement a lot or beloved to rearrange furniture! It is so rewarding and empowering to be able to build your own article of furniture! This was how I felt when I jumped into a 16 week forest working course and made this wall chiffonier!
* Some resources in article are affiliate links. Full disclosure here .

The rope shelf we are making today is a lot easier!
Materials and tools to make DIY hanging rope shelf:

- ropes: you can apply 25 feet of 3/8″ to i/ii″ jute or sisal rope, or cotton rope that comes in many colors.
- wood shelves: each slice measures 8″ wide by 24″ long by 0,75″ thick. If you lot get one×8 pine or other type of wood at the hardware store, they will cut it into 2′ section for you.
- paints: I used acrylic paint to dye the ropes and paint the shelves.
- It'south super easy to hang the shelf. We used Monkey Hook Like shooting fish in a barrel Pic Hangers for Drywall, 50lb.
- the just tool we need is a drill! And a 3/four″ Drill Flake like this
Pace one: gear up ropes for hanging woods shelves

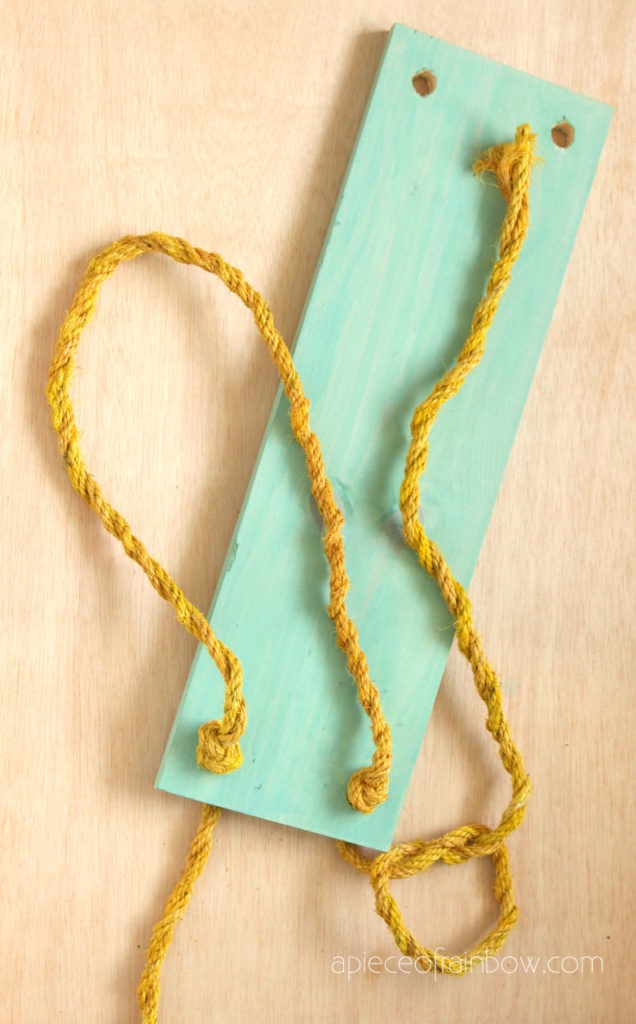
This footstep is optional. Dye the rope by dipping information technology into a bowl of diluted yellow acrylic paint. Lay information technology on plastic or hang it to dry.

Sisal ropes tin can have lots of loose fiber hanging, so I trimmed it a fleck to give a cleaner look.

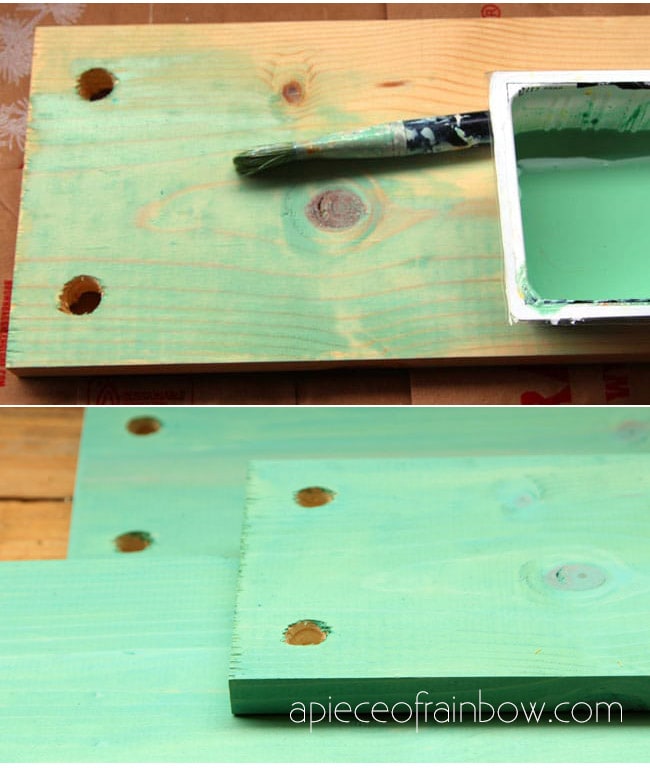
Step two: marker wood shelves & drill holes
Here's a piece of cake picayune trick on how to drill the 4 holes on each board: cutting a square piece of newspaper ane.5″x1.v″, line information technology at each of the four corners, and describe a dot at the other corner. This will give united states of america the centers for the drill to start.

Use some scrap woods under the board that volition be drilled through to protect your work table. Sand the wood a little if needed.

We used a 3/four″ Drill Chip like this to drill the holes for the ropes to go through.

Step 3: how to tie knot for DIY hanging rope shelf
Paint the wood with your favorite colors of acrylic paint or milk pigment. I love turquoise, I as well diluted the acrylic paint so the wood grains notwithstanding shows a bit.
Cut 2 pieces of 1/two″ thick rope, each about 12.5′ long.

I as well colored a small piece of sisal rope the turquoise colour for some fun details later.

Fold a slice of rope in half, start making the outset two knots, i at about 11″ from the mid indicate, the other at thirteen″ from mid point.
Thread through the 2 holes on the top shelf, and then tie a knot on the underside of each hole. Repeat on the other side.

The second and third shelf are all spaced at 12″ apart. So measure the rope and do the same knotting and threading for each shelf, go along testing and adjusting the knots if needed.

Gotta accept tassels right? It's and so easy to make tassels with sisal ropes!
After the terminal knot, keep loosening all the twists on the ropes until y'all become a tassel similar bundle. I also added the small slice of turquoise rope for a fun emphasis.

There are many ways to hang the shelf. We have dry wall, so nosotros used Monkey Hook Easy Picture Hangers for Drywall, each with 50 lb capacity.


What style should nosotros call our rope shelf? Beachy and carefree? Colorful boho farmhouse? 🙂
Talking nigh carefree, this 2 pallet potting bench is definitely part of the group!

Or these stenciled pallet wood floor mat!


Comments
Post a Comment